


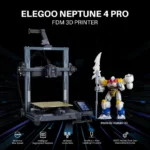
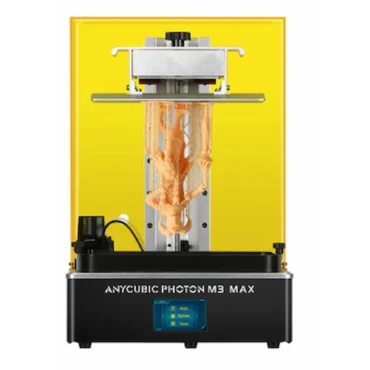
Elegoo Neptune 4 Pro
25.500 EGP
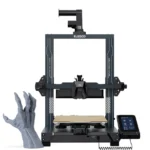
The Elegoo Neptune 4 Pro stands out in the competitive 3D printing market
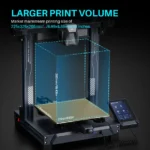
- Print Volume: 225 x 225 x 265 mm³
- Max Printing Speed: 500 mm/s
- Intelligent Segmented Heatbed
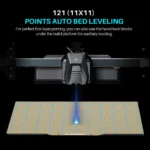
- 121 (11 x 11) Points Auto Bed Leveling
- Up To 300 °C High-Temp Nozzle
- Support PLA/TPU/PETG/ABS/ASA/Nylon Filaments
- USB/LAN Transfer
Out of stock
Unboxing and Initial Setup
When unboxing the Elegoo Neptune 4 Pro, users will first notice the meticulous packaging that ensures all components arrive in pristine condition. Upon opening the box, you’ll find the 3D printer itself, neatly surrounded by foam inserts for protection during transit. The main components include the printer’s chassis, the print bed, and the extruder assembly, all securely packaged to prevent any damage.
Included in the box are several tools necessary for assembly and maintenance. These typically include hex wrenches, a nozzle cleaning needle, and pliers. You’ll also find a spool holder, a feed tube for the filament, and a sample spool of PLA filament to get you started. The manufacturer’s manual offers a comprehensive guide and should be your go-to for any questions during setup. Additional accessories include an SD card preloaded with sample .gcode files, a USB cable for connecting the printer to your computer, and a scraper for removing prints from the bed.
Starting the assembly process, connect the base frame of the Elegoo Neptune 4 Pro to the vertical gantry using the provided screws and hex wrenches. Next, attach the extruder module to the gantry. Make sure to secure the print bed, aligning it correctly to avoid any wobbling. After assembling the physical components, it’s time to connect the necessary cables. This typically involves attaching the power supply, stepper motor cables, and the touchscreen controller. Ensuring that each cable is snugly connected is crucial for the machine’s operation.
Once assembled, it is vital to level the print bed. Most beginners find this step challenging, but the included manual provides easy-to-follow instructions. Adjust the leveling knobs under the print bed while using a piece of paper to gauge the distance between the nozzle and the bed. Repeat this process for all corners until the bed is fully leveled.
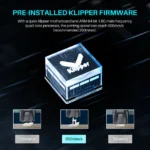
After the hardware setup, proceed to install the required software and firmware. The SD card will likely contain the necessary firmware; load this onto your printer via the touchscreen interface. Software like Cura can be used for slicing your 3D models. Install this on your computer and configure it to work with the Neptune 4 Pro, ensuring settings such as nozzle size and print bed dimensions are accurately inputted.
In the final phase of setup, run the printer’s calibration process. This step ensures that the extruder and print bed operate smoothly together. The touchscreen interface will guide you through calibrating the X, Y, and Z axes. If the machine doesn’t perform as expected, the manual’s troubleshooting section can guide you through common issues like uneven prints or filament jams.
Features and Performance
The Elegoo Neptune 4 Pro stands out in the competitive 3D printing market, primarily due to its robust set of features and impressive performance metrics. At the core of this sophisticated printer is a substantial build volume, measuring 220 x 220 x 250 mm, which accommodates a wide range of project sizes. Precision is a hallmark of the Neptune 4 Pro, boasting a layer resolution of up to 50 microns, ensuring fine details and smooth print surfaces.
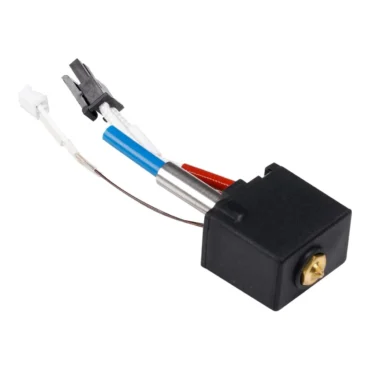
One of the significant enhancements in the Elegoo Neptune 4 Pro is its dual gear extruder. This component greatly improves filament control and extrusion consistency, reducing the likelihood of jams and enhancing the overall print quality. Complementing this is the heated bed, which provides optimal adhesion and minimizes the risk of warping, particularly when printing with materials like ABS and PLA. Furthermore, the inclusion of silent stepper drivers ensures that the printer operates quietly, which is a notable improvement over earlier models.
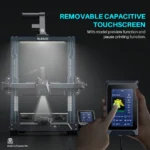
Additional features include an easy-to-navigate user interface. The touchscreen control panel is intuitive, offering a seamless experience for both novice and experienced users. The menu layout is straightforward, with clear options for managing print settings and monitoring progress. Usability is further enhanced with features like resume printing, which can be a lifesaver in the event of a power outage, and filament run-out detection, which prevents print failures due to depleted filaments.
When analyzing the performance of the Elegoo Neptune 4 Pro, it consistently delivers high-quality prints with remarkable accuracy. The print speed, while varying depending on the complexity of the task and the material used, is generally competitive, allowing for efficient project completion without compromising on detail. Reliability is a strong suit of this model, as users frequently report consistent, trouble-free operation across diverse print projects.
User feedback underscores the printer’s strengths, particularly noting its dependability and quality of prints. Moreover, when compared to other 3D printers in its price range—such as the Creality Ender 3 and the Anycubic i3 Mega—the Elegoo Neptune 4 Pro often emerges as a favorite due to its superior extruder system and quieter operation. However, some users mention the assembly process can be somewhat challenging, which may require a learning curve for beginners.
Overall, the Elegoo Neptune 4 Pro offers a comprehensive set of features and high-level performance that make it an exceptional choice among 3D printers in its category. Whether you’re a hobbyist or a professional, its combination of usability, advanced features, and solid performance makes it a worthy investment.

Only logged in customers who have purchased this product may leave a review.


Reviews
Clear filtersThere are no reviews yet.